Thursday, July 26, 2012

Vacation + Accident = Long Delay


Wow! My last post was on April 20, the day before my 3-week vacation with my fiance. It was a totally gunpla-free vacation except for the 2 kits I picked up on the way home. It was all very nice and fun and even got myself a natural tan. 

Well, a couple of weeks after getting back from vacation just before I resume working on the Reborns kit, I got into a motorXmotor collision. I got thrown off the bike. Got a lot of bruises and a concussion, as evidenced by my total lack of recall of the moment of impact. Even now I still feel the after effects of my concussion (the headache/dizziness). That accident made me realize that the TV/Movie depictions of people who get knocked out in the middle of an action sequence and get back up and "shake it off" is complete bullshit.

I should be back to work soon, but for now standing in for Reborns is dear Murmeltier.


Friday, April 20, 2012

Kit Build #2 - Reborns Gundam -Part 7


Lower Torso


Scratched out a groove in the middle using the chopstick+needle tool I mentioned in the previous post to make "half and half" coloring easier. The needle tool was only for making a guide line for my Tamiya Scriber tool to follow.

Painted the first half red.

The other half blue.

Peeled and side by side.


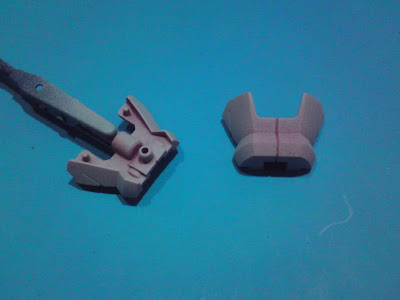
The final piece for the lower torso is painted white to serve as a divider between the red and blue halves. This and other "centered" pieces will be painted white.


Hips/Groin

 Front half.

Rear half.

Side by side.

Top view.

Lower torso attached.


Red and Blue, side by side. Almost done, but not quite. I'm absolutely certain the two heads will be a pain in some manner I haven't imagined, but I'm already dreading masking the upper torso. The side skirt armors won't be needed since I have something else in mind to use instead.

Almost done, almost done.

Friday, April 13, 2012

Kit Build #2 - Reborns Gundam - Part 6 Extended

Coming back after a two-month break being sick and playing Mass Effect 2, Dragon Age 1 & 2, I'm back to where I left off.

Now, putting together the wings...


I used the same technique I did with the bottom of the feet to apply a darker color on the inside of the beam saber space. Then I filled it with sticky-tack to keep out the respective red and blue I painted on the outside of the pieces. At first I thought of using some masking tape for the smaller areas, but sweaty fingers tend to make masking tape not stick especially if you try to stick it on a small surface. The good thing about using sticky tack is you can shape it like clay, but you need to use a tool with a small surface area to prevent the sticky tack from clinging to your tool while you pack it in the spaces that need covering.


I used this self-made scriber which is made from 2/3rds of a decent-quality chopstick with a needle inserted into a hole drilled at the thicker end.


And now the biggest downside to using sticky tack... when putting it in a deep and narrow space, it doesn't always come out very easily. Bits and pieces tend to get stuck inside corners and removing them from these pieces took me 45 minutes.

Putting the main parts of the wing together.

Now with all the funnels combined.

Thursday, February 02, 2012

Kit Build #2 - Reborns Gundam - Part 6

Masking Hell Revisited


Standard fare of surfacer + paint, let dry, then masking. I really don't like wrapping up small pieces repetitively but in the case of gunplas the result would always make it worth the trouble.


See? All that wrapping just to paint a small part that WILL be nearly completely hidden once assembled.


Lucky for me these thing have a decent amount of panel lines. And yes, the time it takes to properly apply the masking tape was well worth my time.

Friday, January 27, 2012

Kit Build #2 - Reborns Gundam - Part 5 The-Half-Way-There Post


Just look at these babies! All that trouble I went through was worth it. I really didn't like the idea of being forced to leave the soles of the feet parts in a singular color and my crappy paint skills would show even more. At least the technique I used (as detailed in the previous post) worked just as I hoped. Of course, being forced to let the paint harden for two weeks prevented me from accidentally ruining it while removing the masking solution.

The only hitch post-unmasking was the deep empty spaces near the edges of the front feet parts. While this type of moulding lets Bandai reduce the number of pieces needed for to form the feet, it also presents a problem for spray painting. I painted these grooves using a tiny, slim paint brush and extracted Gundam Marker Pen inks in red and blue. The red half was painted without a snag but the blue marker ink was lighter than Tamiya's Blue spray paint. Luckily the side grooves were too narrow to make the paint's different shade noticeable but the front can be seen clearly. The solution was to mask everything but the top groove and spray on a layer on Tamiya Blue to match the colors.

Now here are the limbs in their Painted(delicate) glory.


Wednesday, January 11, 2012

Kit Build #2 - Reborns Gundam - Part 4 Delay Edition

A 4-piece DELAY


The 4 feet parts shown here have been the cause of some very long delays compounded by my lack of vacation days. The main problem I had with these parts was managing how the dark paint can be applied to the inner depressions of the feet while applying the main red/blue colors to the rest. These pieces are very different from the feet of my previous build Extreme Gundam making it difficult to use the simpler way of masking the edges of the depression.

The following photos will show the method I decided to use instead.

 Spray Dark Blue onto the soles and let dry

Carefully sand away the outer parts leaving depression with paint

Apply decent amount of masking solution to the parts that need covering

Apply surfacer then spray pieces in respective colors.

Since this gave me quite a headache, I'll leave it alone to harden for two weeks then peel off the masking solution. Hopefully the paint will be cured by then. Once these pieces are finished both legs could finally be completed.

Friday, December 16, 2011

Kit Build #2 - Reborns Gundam - Part 3


The legs of this kit was designed wonderfully. The clever use if simple pieces were all that was needed to facilitate the forward and backward bending of the knees the change from Gundam mode to Cannon mode present. Parts separation was straight forward and simple enough allowing it to be put together even without checking the manual.

The mechanism for the moving knee armor is impressive and one would wonder why Bandai can't apply it to all its 1/144 kits. This boils down to the mecha design and how it would translate into the model kit's form and how much it would affect the cost of implementing the gimmick.

Legs Assembled


The grey joint-parts were left unpainted, only panel-lined. Panel-lining was done using the wonderful magic of black enamel aided by a black Gundam Marker Pen. Building the legs was much easier than the arms since there were a decent mount of gap between the sliding pieces and required no extra sanding to allow the joint to move without scratching the new paint job.